

Exploring the Power of React Native & AWS Amplify in Creating a Full-Stack OnlyFans Clone


Table of contents
Frontend
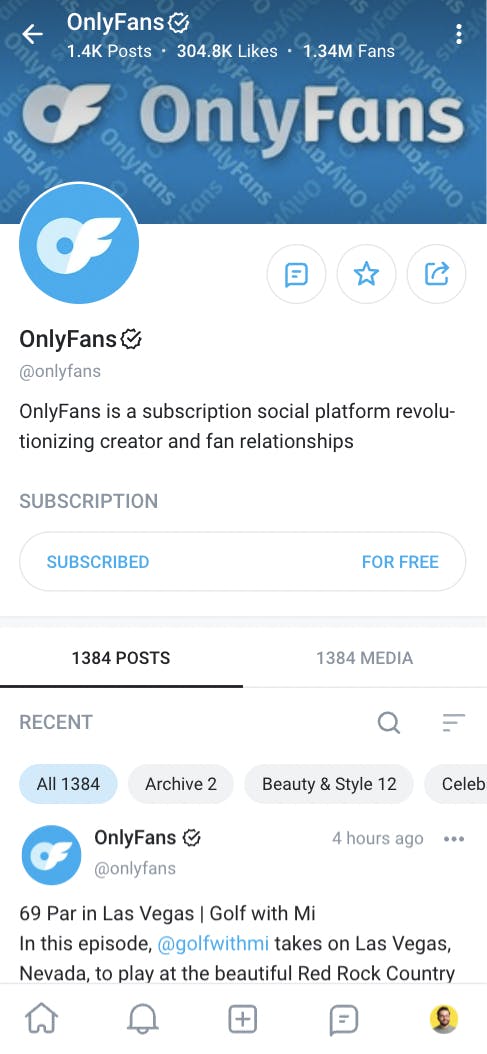
In this article, we will walk you through the process of building a Paywalled Content-Sharing App content-sharing application using React Native. Inspired by OnlyFans this app allows creators to share exclusive content behind a paywall, with users directly supporting them. We will cover both the front-end and back-end aspects of the application, making it accessible for both iOS and Android users. Let's dive into the step-by-step guide!
We'll set up the project using the
npx create-expo-app@latest -e with-router
command with the latest version of Expo. You'll learn how to view the app on iOS, Android emulators, or your physical device using the Expo Go app by scanning a QR code.
In the following section, we'll design the home screen, displaying posts and recommended users to follow. We'll start by rendering a single user's information like their background, avatar, name, and handle using dummy data.
For Posts

Then, we'll style the user card component by adjusting the layout, adding padding, and rendering an image using the React Native image component.
For User
Next up, we'll focus on the profile page. We'll render the cover image, add a back button, display the account name
Now we'll create a new post screen. You'll learn how to add text input functionality and implement the select image feature using Expo Image Picker.

We'll then style the app elements and add icons, making it visually appealing and protecting user content with a paywall.
Backend
Prerequisites:
An AWS account - If you don't have one, you can sign up for a free account on aws. @AwsAmplify
Node.js installed on your machine - You can download it from nodejs.org.
Setting up the Project: Clone the repository: Begin by cloning the project repository from the provided link and switch to the UI branch.
Install dependencies: Navigate to the project directory and install the necessary dependencies by running
npm installStart the development server: Run
npm startto start the development server. Connect to React Native application:Use the Amplify Pool command to connect the backend to the React Native application.
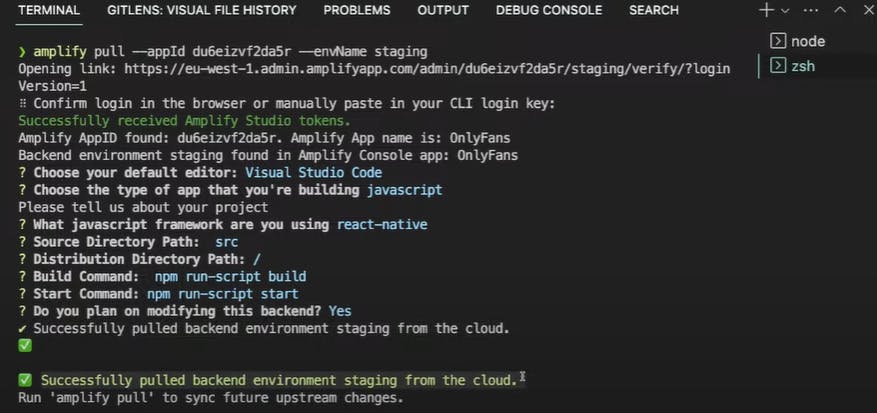
Setting up the Amplify Configuration:
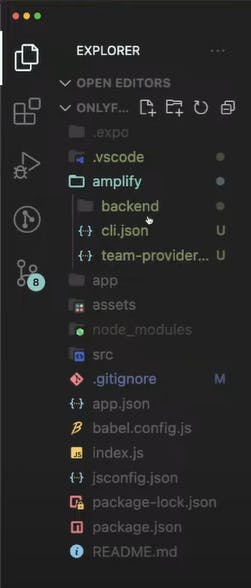
a. Amplify Folder: Explore the Amplify folder, which contains most of the backend code and configuration.
Implementing Authentication:
Set up Root Layout File: Create a root layout file (e.g., layout.js) using Expo router to wrap all pages and add global providers like React Context.
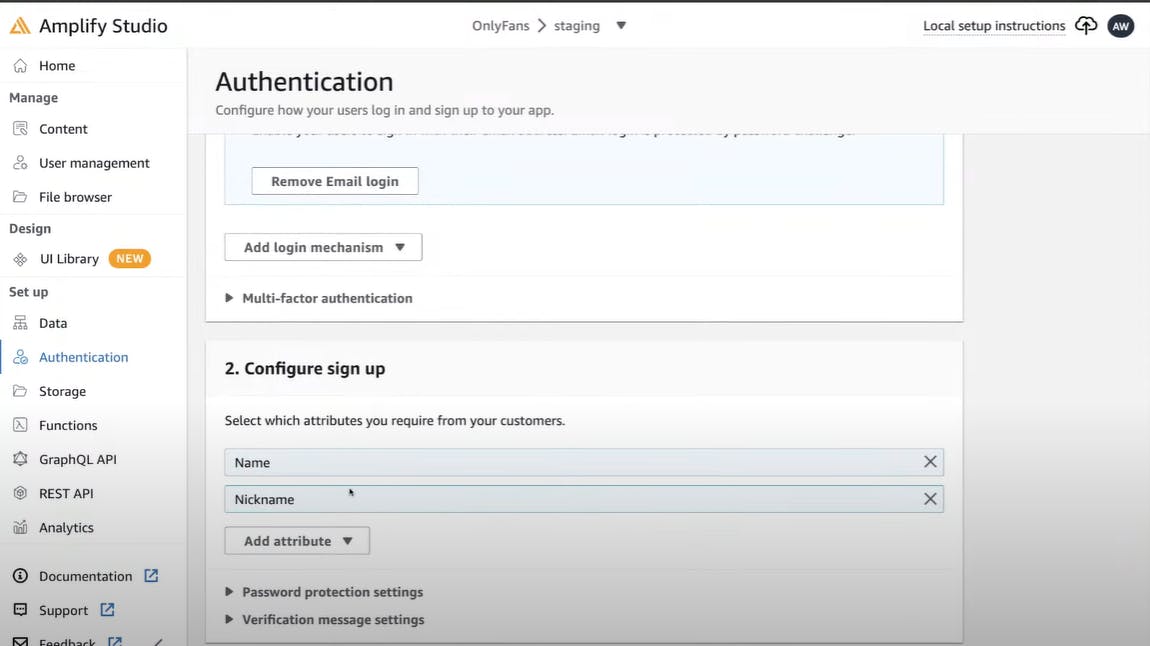
Set up Authentication: Use Amplify Studio to set up authentication with options like email login.
- Implementing Authentication with Amplify UI Library:
Install Required Packages: Install the necessary packages for Amplify UI Library and import the Authenticator component.
npm install @aws-amplify/ui-react-native react-native-get-random-values react-native-url-polyfill
Import the withAuthenticator Higher-Order Component and useAuthenticator hook:
import { withAuthenticator, useAuthenticator } from '@aws-amplify/ui-react-native';copy
<Authenticator.Provider>
      <Authenticator>
        <Stack screenOptions={{ headerShown: false }} />
      </Authenticator>
    </Authenticator.Provider>
Lastly, wrap your App export with the withAuthenticator Amplify UI component:
export default withAuthenticator(App);
User Account Creation and Authentication Flow: Create User Account:
Create an account using Amplify UI Library. The user fields like name and nickname are parsed and rendered in the account creation form.
Multi-Factor Authentication: Receive a confirmation code via email and go through the authentication flow with multi-factor authentication.
Redirect and Auto Sign-In: After authentication, the user is redirected to the application's home screen and will be remembered for future sign-ins.
- Setting up the Database and API:
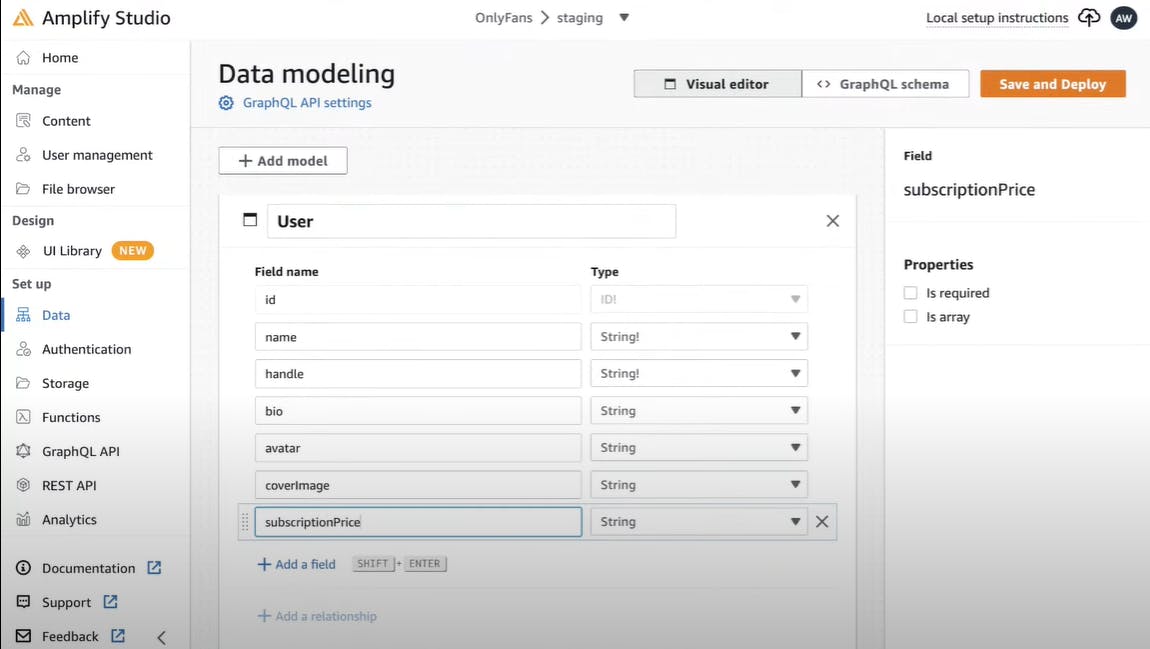
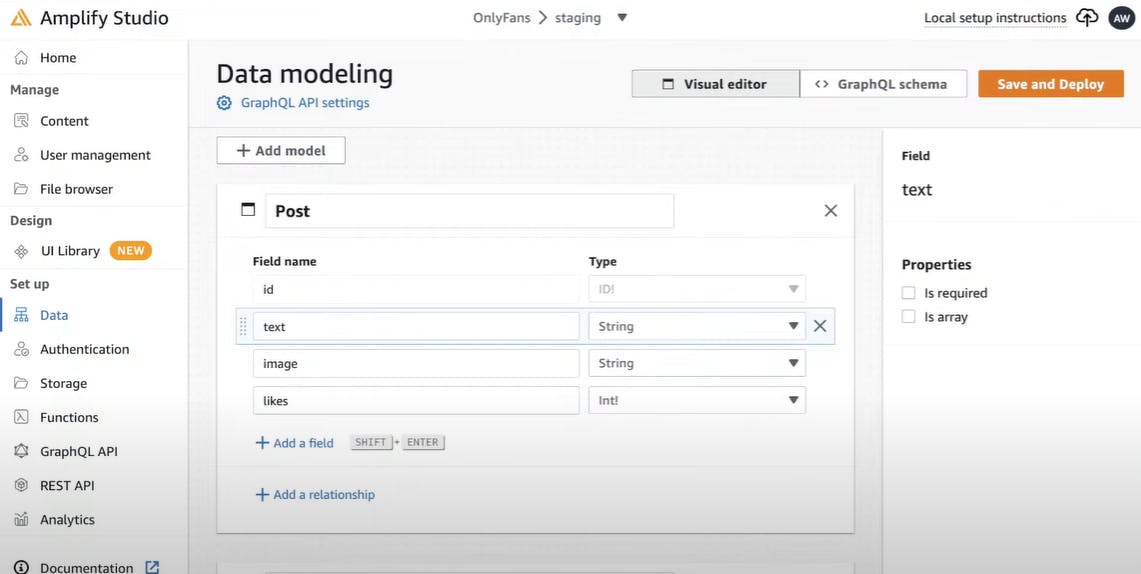
Design Data Models: Define data models for users and posts with required fields like name, handle, bio, avatar, cover image, text, image, and likes.
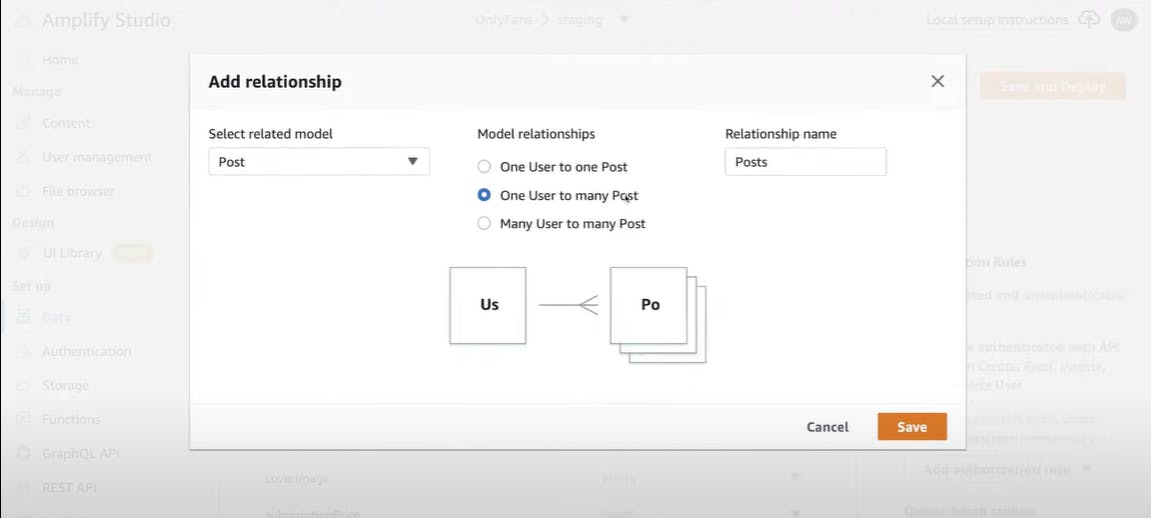
Set up Relationships: Set up the one-to-many relationship between users and posts using AWS Amplify.
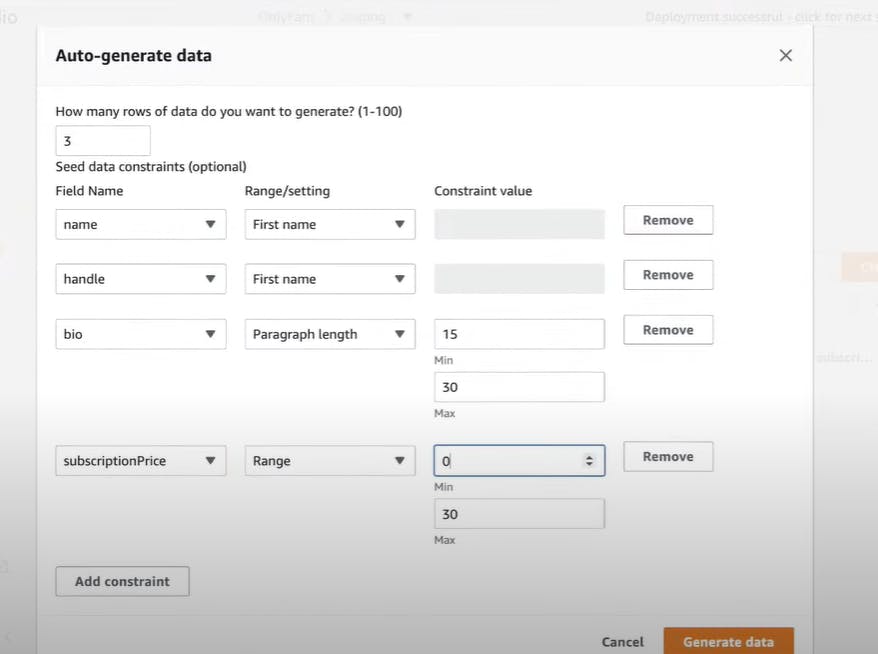
Save and Deploy Changes: Save the changes and deploy the backend environment, which automatically creates DynamoDB tables for each model.
- Querying Data from the Database:
Use DataStore Library:
Import the DataStore library provided by Amplify and import the user model from the automatically generated models file.
  import { DataStore } from 'aws-amplify';

useEffect(() => {
    // fetch users
    DataStore.query(User).then(setUsers);
  }, []);
Query User Data: Use the
datastore.querymethod to fetch user data and set the results in the state using thesetUserssetter.
Congratulations on successfully building the Paywalled Content-Sharing App backend using AWS Amplify.
By following the step-by-step guide, you have successfully implemented authentication, database modeling, and data querying. The possibilities for further enhancements and features are limitless. Happy coding!
Resources:
AWS Amplify: The official AWS Amplify website provides documentation, guides, and resources to get started with Amplify. Visit aws.amazon.com/amplify for more information.
This project is OpenSource. You can get the Source Code
AWS Free Tier: Learn more about AWS Free Tier, which provides a limited amount of free resources for testing and development. Check the AWS Free Tier page at aws.amazon.com/free for eligibility and benefits.
Check out the Hashnode website at hashnode.com to engage with the developer community and explore informative blog posts.